

Volusion Source Data Export
Export the required Volusion standard tables and product image URLs as CSV files for file-based migration.
Volusion Source Data Export
Section titled “Volusion Source Data Export”Supported Files
Section titled “Supported Files”When Volusion is selected with File Upload, the standard Source file set is:
| Entity | Expected filename |
|---|---|
| Global | ExchangeRates.csv |
| Tax | Tax.csv |
| Category | Categories.csv |
| Product | Products.csv |
| Category | OptionCategories.csv |
| Product | Options.csv |
| Product | KITS.csv |
| Product | KITLNKS.csv |
| Product | ProductImages.csv |
| Customer | Customers.csv |
| Order | Orders.csv |
| Order | OrderDetails.csv |
| Order | TrackingNumbers.csv |
| Review | Reviews.csv |
Volusion file-based migration uses STANDARD EXPORT for the main source tables. If the store has more than one image per product, also create the ProductExport saved query so the migration package includes the product image URLs that Next-Cart needs to process those images.
Export the source data
Section titled “Export the source data”Export the standard Volusion tables
Section titled “Export the standard Volusion tables”-
Sign in to Volusion.
-
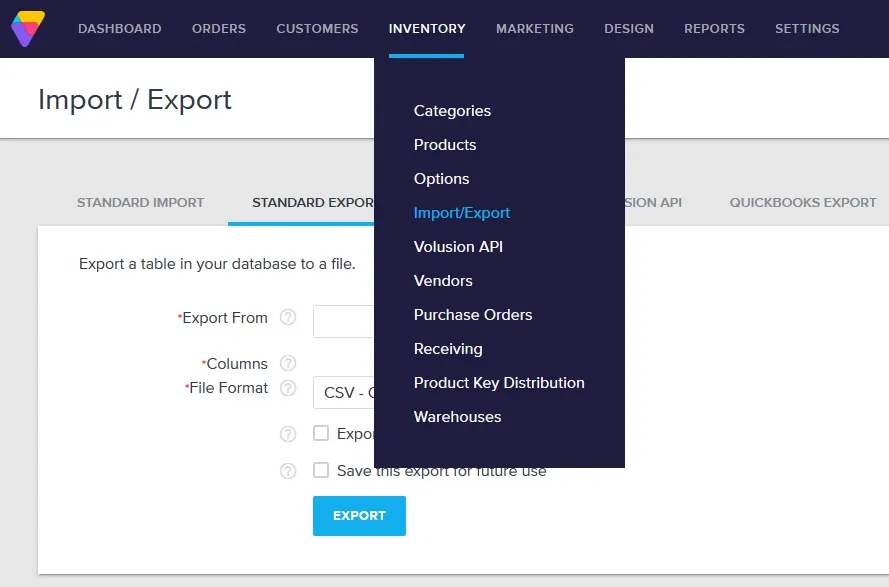
Go to Inventory > Import/Export and open STANDARD EXPORT.
-
In Export From, choose the table to export.
-
Under Columns, select Check All.
-
For File Format, choose CSV - Comma Delimited Text File.
-
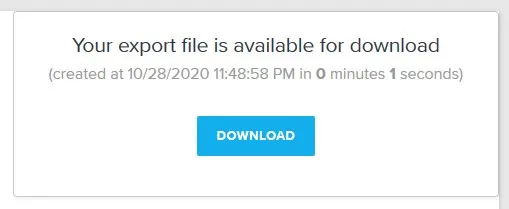
Click Export, then click Download in the pop-up when the export is ready.
-
Repeat the process for the data areas required by the migration. Export the following tables
ExchangeRates, Tax, Categories, Products,OptionCategories,Options,KITS,KITLNKS, Customers, Orders,OrderDetails,TrackingNumbers, and Reviews.
Export product image URLs
Section titled “Export product image URLs”When the Volusion store has more than one image per product, create the ProductExport saved query and export its result as a separate CSV. The query generates the product image URL columns that must accompany the other Volusion source files.
Go to Inventory > Import/Export > Saved Exports, then click Add New Query. Configure the saved query with these exact values:
| Field | Value |
|---|---|
| QB Customer ID | 0 |
| QB Table | DB_EXPORT |
| QB Title | ProductExport |
| QB Query Type | SELECT |
| QB Export File Type | CSV |
In QB Query, paste the following query exactly:
SELECTp.ProductCode AS 'Unique Retailer SKU', 'Config_FullStoreURLConfig_ProductPhotosFolder/'+ p.ProductCode + '-2.jpg' AS 'Image URL 1', 'Config_FullStoreURLConfig_ProductPhotosFolder/'+ p.ProductCode + '-3.jpg' AS 'Image URL 2', 'Config_FullStoreURLConfig_ProductPhotosFolder/'+ p.ProductCode + '-4.jpg' AS 'Image URL 3', 'Config_FullStoreURLConfig_ProductPhotosFolder/'+ p.ProductCode + '-5.jpg' AS 'Image URL 4', 'Config_FullStoreURLConfig_ProductPhotosFolder/'+ p.ProductCode + '-6.jpg' AS 'Image URL 5', 'Config_FullStoreURLConfig_ProductPhotosFolder/'+ p.ProductCode + '-7.jpg' AS 'Image URL 6', 'Config_FullStoreURLConfig_ProductPhotosFolder/'+ p.ProductCode + '-8.jpg' AS 'Image URL 7', 'Config_FullStoreURLConfig_ProductPhotosFolder/'+ p.ProductCode + '-9.jpg' AS 'Image URL 8', 'Config_FullStoreURLConfig_ProductPhotosFolder/'+ p.ProductCode + '-10.jpg' AS 'Image URL 9', 'Config_FullStoreURLConfig_ProductPhotosFolder/'+ p.ProductCode + '-11.jpg' AS 'Image URL 10', 'Config_FullStoreURLConfig_ProductPhotosFolder/'+ p.ProductCode + '-12.jpg' AS 'Image URL 11', 'Config_FullStoreURLConfig_ProductPhotosFolder/'+ p.ProductCode + '-13.jpg' AS 'Image URL 12', 'Config_FullStoreURLConfig_ProductPhotosFolder/'+ p.ProductCode + '-14.jpg' AS 'Image URL 13', 'Config_FullStoreURLConfig_ProductPhotosFolder/'+ p.ProductCode + '-15.jpg' AS 'Image URL 14', 'Config_FullStoreURLConfig_ProductPhotosFolder/'+ p.ProductCode + '-16.jpg' AS 'Image URL 15', 'Config_FullStoreURLConfig_ProductPhotosFolder/'+ p.ProductCode + '-17.jpg' AS 'Image URL 16', 'Config_FullStoreURLConfig_ProductPhotosFolder/'+ p.ProductCode + '-18.jpg' AS 'Image URL 17', 'Config_FullStoreURLConfig_ProductPhotosFolder/'+ p.ProductCode + '-19.jpg' AS 'Image URL 18', 'Config_FullStoreURLConfig_ProductPhotosFolder/'+ p.ProductCode + '-20.jpg' AS 'Image URL 19', 'Config_FullStoreURLConfig_ProductPhotosFolder/'+ p.ProductCode + '-21.jpg' AS 'Image URL 20', 'Config_FullStoreURLConfig_ProductPhotosFolder/'+ p.ProductCode + '-22.jpg' AS 'Image URL 21', 'Config_FullStoreURLConfig_ProductPhotosFolder/'+ p.ProductCode + '-23.jpg' AS 'Image URL 22', 'Config_FullStoreURLConfig_ProductPhotosFolder/'+ p.ProductCode + '-24.jpg' AS 'Image URL 23', 'Config_FullStoreURLConfig_ProductPhotosFolder/'+ p.ProductCode + '-25.jpg' AS 'Image URL 24', 'Config_FullStoreURLConfig_ProductPhotosFolder/'+ p.ProductCode + '-26.jpg' AS 'Image URL 25', 'Config_FullStoreURLConfig_ProductPhotosFolder/'+ p.ProductCode + '-27.jpg' AS 'Image URL 26', 'Config_FullStoreURLConfig_ProductPhotosFolder/'+ p.ProductCode + '-28.jpg' AS 'Image URL 27', 'Config_FullStoreURLConfig_ProductPhotosFolder/'+ p.ProductCode + '-29.jpg' AS 'Image URL 28', 'Config_FullStoreURLConfig_ProductPhotosFolder/'+ p.ProductCode + '-30.jpg' AS 'Image URL 29'
FROM Products pINNER JOIN Products_Descriptions pd ONp.ProductID = pd.ProductIDINNER JOIN Products_Extended pe ONpd.ProductID = pe.ProductID
ORDER BY p.ProductCode
After the fields and query are complete:
-
Select Save to create the saved query.
-
Return to Inventory > Import/Export > Saved Exports. In Saved Queries, choose
ProductExport. -
For File Format, choose CSV - Comma Delimited Text File, then select Export.
-
When the export completes, select Download. Keep the downloaded Product image URL CSV with the rest of the Volusion export package and prepare that supported upload file as
ProductImages.csv.
Verify the export
Section titled “Verify the export”Confirm that:
- every required standard table was exported with all columns;
- each CSV opens without structural errors;
ProductExportis included when the store has more than one image per product; and- the Product image URL CSV contains Unique Retailer SKU plus the expected Image URL columns.
If the export is incomplete
Section titled “If the export is incomplete”- Re-run only the affected standard export after checking the selected table and columns.
- If
ProductExportis missing, create the saved query using the exact field values and SQL above, then export it again. - If a generated file is empty or unreadable, create a fresh export instead of editing the file manually.
- If a required data area remains unavailable, stop before substituting another file and submit a support ticket with the platform, missing data area, and export option you used.
- After correcting the export, repeat the verification checks before upload.
Next Steps
Section titled “Next Steps”Continue with Upload Source Data Files to prepare and validate the exported files for the Source connection.