

Miva Merchant API Connection
Create a Miva Merchant API token, assign the required groups, and enter the Store URL, Endpoint URL, and Access Token required by Next-Cart.
Miva Merchant API Connection
Section titled “Miva Merchant API Connection”Create an API token and assign its access groups in Miva Merchant.
Get the connection details
Section titled “Get the connection details”-
Sign in to Miva Merchant Admin and open Settings > User Management.
-
Open API Tokens and click Add API Token.
-
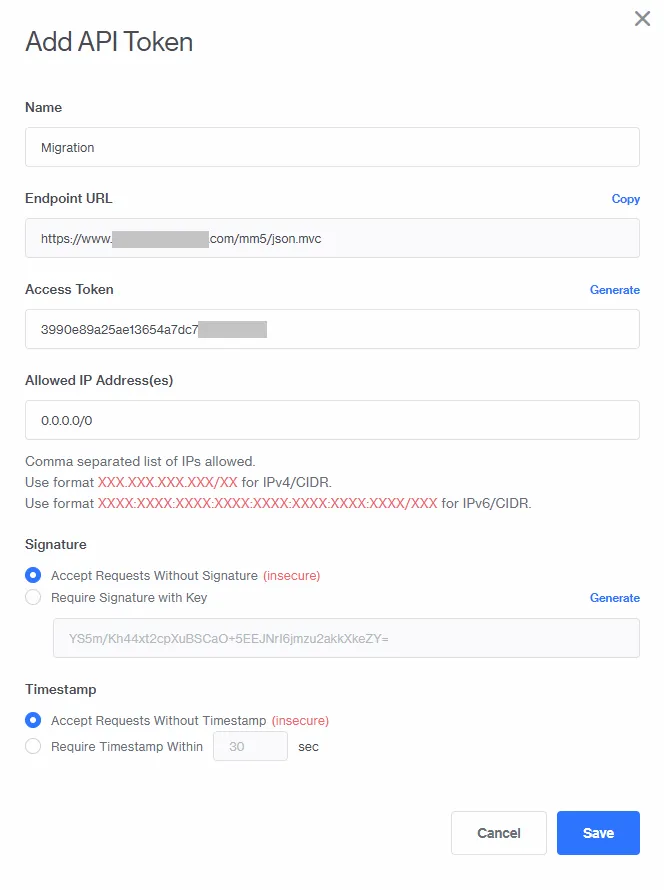
Enter a name. Copy the automatically generated Endpoint URL and Access Token.
-
Enter
0.0.0.0/0in Allowed IP Address(es). -
Set Signature to Accept Requests Without Signature (insecure) and Timestamp to Accept Requests Without Timestamp (insecure).
-
Click Save.
-
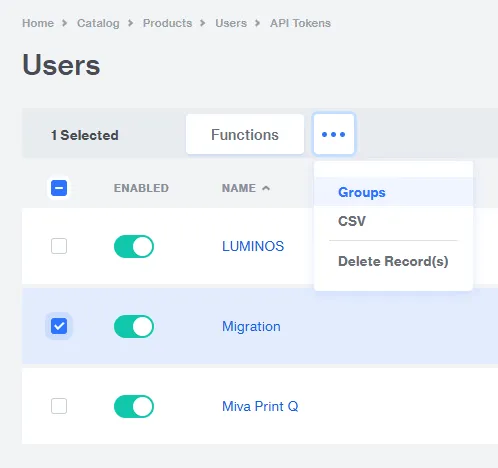
Select the token, open the … menu, and choose Groups.
-
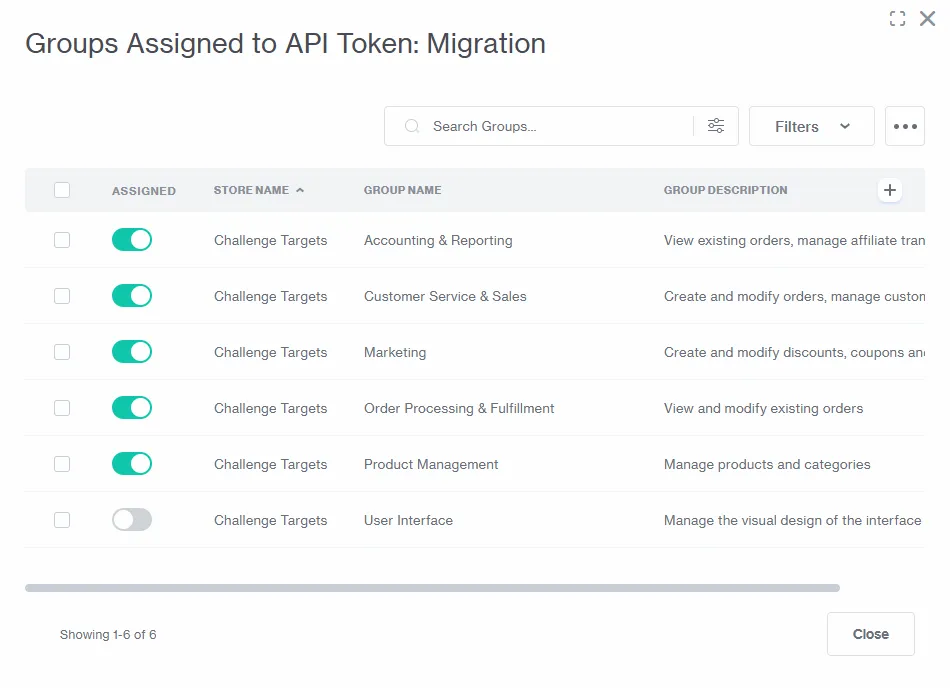
Enable all five required groups:
- Accounting & Reporting
- Customer Service & Sales
- Marketing
- Order Processing & Fulfillment
- Product Management
-
Click Close.
Enter the values in Next-Cart
Section titled “Enter the values in Next-Cart”| Next-Cart field | Value to enter |
|---|---|
| Store URL | The Miva Merchant store URL. |
| Endpoint URL | The automatically generated endpoint for this token. |
| Access Token | The token generated with that endpoint. |
Verify this connection
Section titled “Verify this connection”Use Test Platform Connections for optional access verification. A successful test shows Connected. If the platform remains Not connected, use the shared recovery checks before continuing.