Skip to content
Back to Site

QuickBooks Source Data Export

Prepare QuickBooks products, customers, orders, and sales history export files for Next-Cart source data file upload.

A complete QuickBooks export gives Next-Cart the source files required by the selected migration path.

Use this guide when:

  • QuickBooks is the Source Platform;
  • Next-Cart shows source data file upload for QuickBooks;
  • you need to prepare product, customer, order, or sales history files before upload.

Before you begin, confirm that:

RequirementWhy it matters
QuickBooks administrator accessYou need permission to view and export products, customers, invoices, and sales reports.
Product version identifiedQuickBooks Online and QuickBooks Desktop use different export paths.
Full date range confirmedSales and order history exports must cover the approved migration range.
Report columns reviewedReports should include the fields needed for migration review and mapping.
Secure storage locationPrepare a local folder for XLSX or CSV exports.
Data typeExport fileNotes
Products or itemsProducts and services report, item list, or item CSVName, SKU, price, quantity, and related item fields should remain intact.
CustomersCustomer contact list or customer list CSVInclude customer identifiers, names, emails, phone numbers, and addresses where available.
Orders or sales historyInvoice list, sales report, or order/sales CSVUse the full approved date range.

Create a folder such as:

source-exports/
└── quickbooks/
├── products-or-items/
├── customers/
└── sales-history/
  1. Sign in to QuickBooks Online.
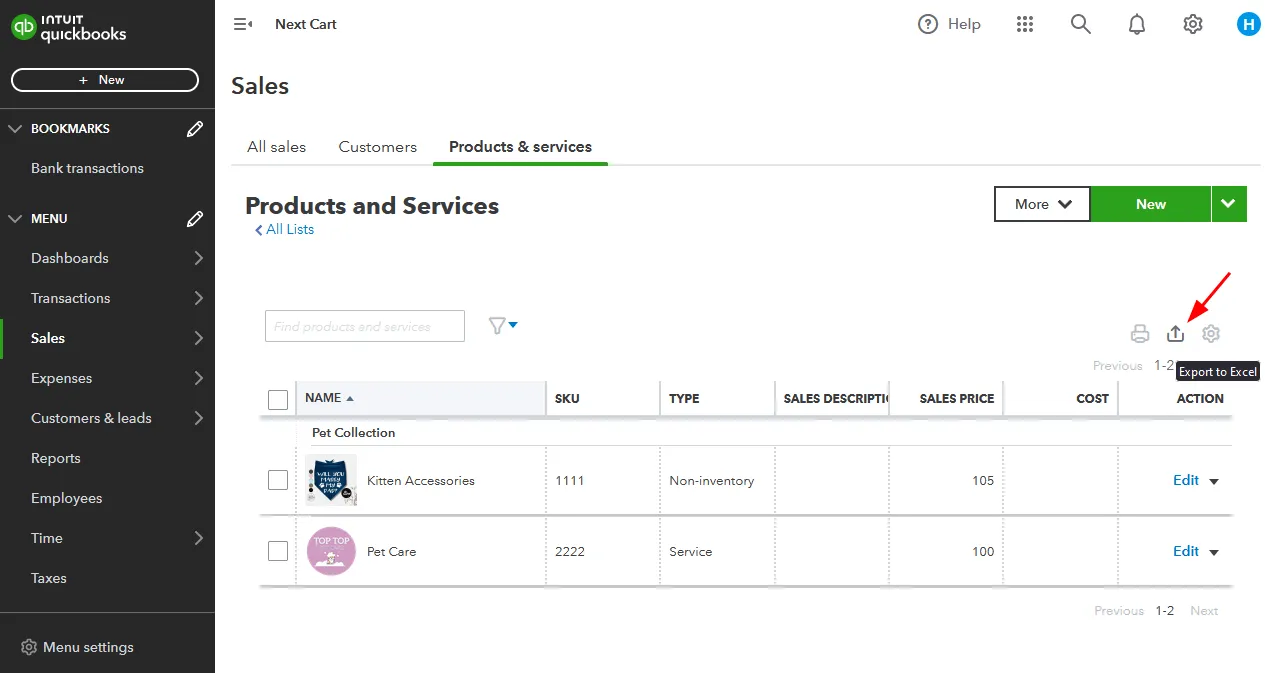
  2. To export products and services, open the settings or gear menu and go to Products and services.
  3. Use the available report, list, or export option to export products and services to Excel.
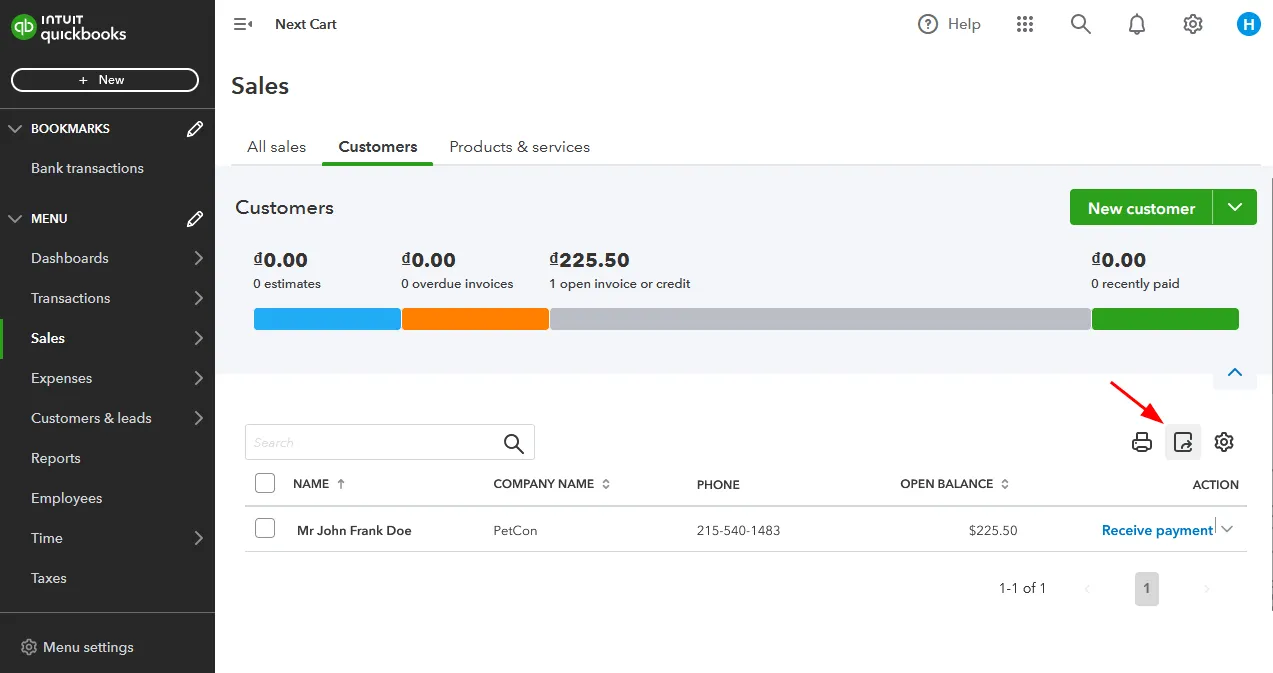
  4. To export customers, go to Reports and open Customer Contact List.
  5. Customize columns if needed, then export the customer report to Excel.
  6. To export sales or order history, go to Reports.
  7. Open Invoice list or the approved sales report.
  8. Set the full migration date range.
  9. Run the report and export it to Excel.
  1. Open the company file as an administrator.
  2. To export items, go to Lists > Item List.
  3. Use the Excel export menu and export all items to CSV.
  4. To export customers, go to Customers > Customer Center.
  5. Use the Excel export menu and export the customer list to CSV.
  6. To export sales or order history, go to Reports > Customers & Receivables or the approved sales report area.
  7. Run the required report for the full migration date range.
  8. Export the report to CSV or Excel.
FilePlace it in
Products and services, item list, or item CSVsource-exports/quickbooks/products-or-items/
Customer contact list or customer list CSVsource-exports/quickbooks/customers/
Invoice list, sales report, or order reportsource-exports/quickbooks/sales-history/

Keep the original file names where possible. Add the QuickBooks version and export date if you need to distinguish multiple exports.

You have QuickBooks product or item, customer, and sales history files ready for upload to Next-Cart.

CheckPass condition
Product or item fileThe file contains the expected products, items, or services.
Customer fileThe file contains the required customer contact records.
Sales historyThe file covers the full approved date range.
ColumnsRequired columns are present and were not renamed.
Version clarityFile names or folder placement make it clear whether the export came from QuickBooks Online, Desktop, or POS.
IssueWhat to check
Sales history is missing recordsGenerate the report again with the full date range and confirm the report type matches the approved scope.
Customer addresses are missingCustomize the customer report columns before exporting again.
Product details are incompleteConfirm the selected product, service, or item export includes all required fields.
CSV or Excel file is not readableRe-export the file and confirm the download or save operation completed.
QuickBooks data does not match eCommerce order structureDocument the gap and submit it as a Custom Service requirement.
GoalGo to
Upload the prepared filesUpload Source Data Files
Verify source file readinessVerify Platform Connections
Ask for help with report or field gapsTickets