

Squarespace Source Data Export
Export Squarespace Products, Customers, Orders, and Blog content using the platform-specific CSV and XML export paths required for file-based migration.
Squarespace Source Data Export
Section titled “Squarespace Source Data Export”Use the native Squarespace export for each data area required by the migration. Products, customer profiles, Orders, and Blog content use different export screens.
Supported Files
Section titled “Supported Files”The Supported Files table in the selected Next-Cart Source setup identifies these upload files. This table does not replace the export procedures below.
| Data | Expected upload filename |
|---|---|
| Product | Products.csv |
| Order | Orders.csv |
| Customer | Customers.csv |
| Blog content | Blog.xml |
Export the source data
Section titled “Export the source data”Products
Section titled “Products”-
Sign in to the Squarespace admin for the intended site.
-
Open Commerce > Inventory, or Selling > Products in the alternate navigation.
-
Click Export all in the upper-right corner to download the Products CSV.
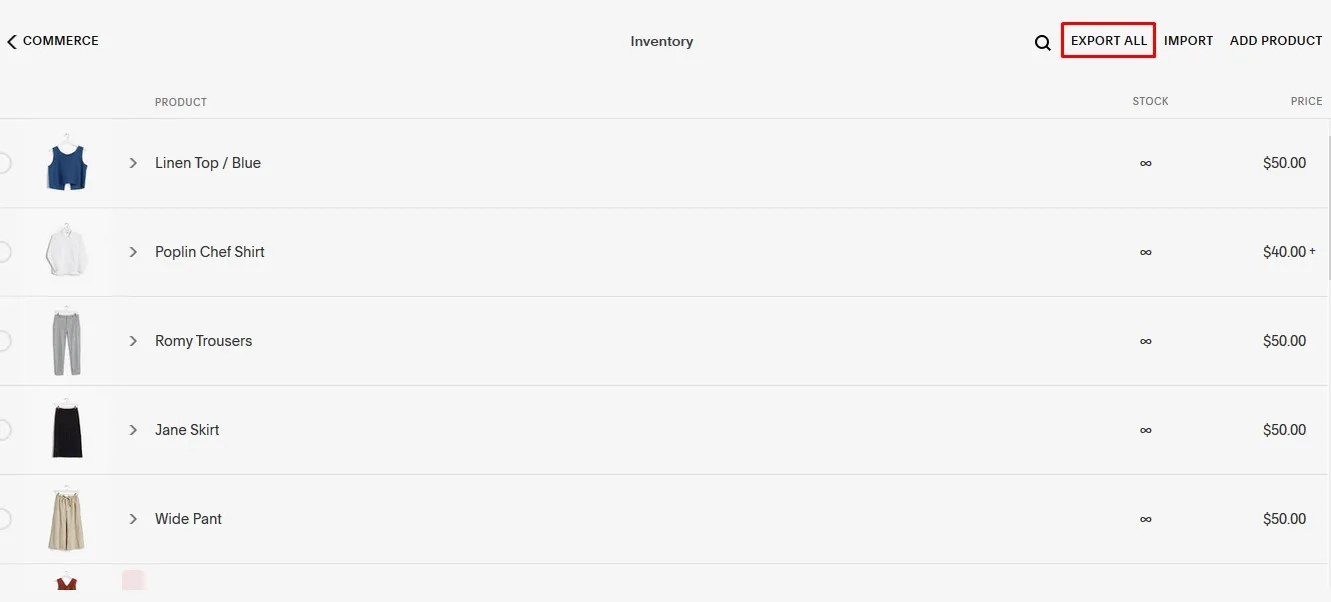
The Product export supports physical and service products, not digital products. It supports up to three variant options per product and up to 10,000 products and variants in the exported set.
Customers
Section titled “Customers”-
Open Commerce > Customers, or Contacts > Customers in the alternate navigation.
-
In the left menu, select Customers, Subscribers, Donors, or All, according to the profiles required for migration.
-
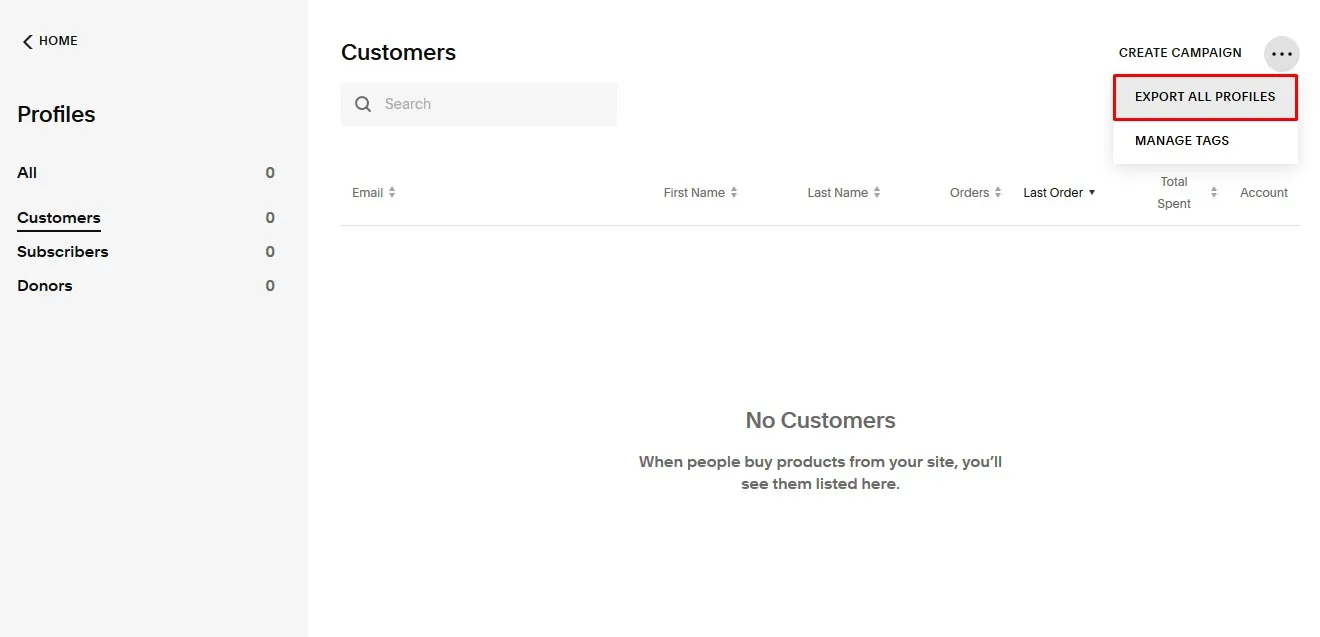
Open the … menu. It appears in the upper-right corner or in the left menu, depending on the Squarespace version.
-
Click Export All Profiles or Export All Contacts, then Confirm.
-
Download the CSV containing the selected profiles, including billing and shipping information.
Orders
Section titled “Orders”-
Open Commerce > Orders, or Selling > Orders in the alternate navigation.
-
Click Export or Download CSV to open the Order export controls.
-
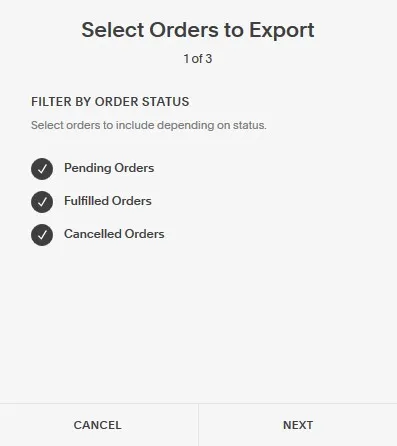
In Select Orders to Export, choose the Order statuses to include: Pending Orders, Fulfilled Orders, and/or Cancelled Orders. Click NEXT to continue through the export selections.
-
Choose the required Date Range and product-detail selections in the export workflow. To include custom product form submissions, export Orders for a specific product.
-
Complete the export and download the Orders CSV.
Blog content
Section titled “Blog content”-
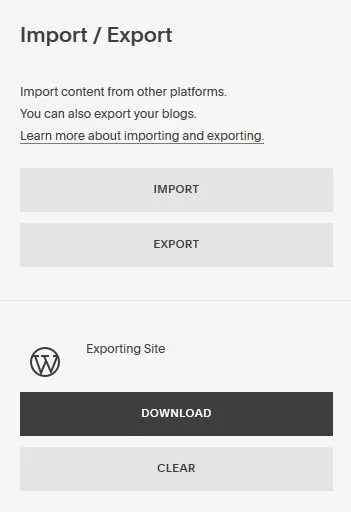
Go to Settings > Advanced > Import / Export.
-
Click Export, then select the WordPress icon.
-
Wait for the export to finish, then click Download to save the XML file.
Next Steps
Section titled “Next Steps”Continue with Upload Source Data Files to prepare and validate the exported files for the Source connection.